
Guy’s tips
Guy Palmer, this website’s webmaster and avid veggie grower, occasionally provides veggie growing and other gardening tips.
- Cross pollination.
- When to harvest sweetcorn.
- Brussels sprouts as a summer crop.
- Only grow one variety of sweetcorn at a time.
- Consider planting sugar snap peas in the summer.
- Grow capsicums and chillies in pots.
- Saving seedlings from snails and slugs.
- Mizuna and mustard greens.
- Easy veggies to grow: silverbeet.
- Potatoes.
- Tromboncino.
- Armenian cucumbers.
- What tomato varieties to grow?.
- Bananas.
- Growing blueberries.
- Valencia oranges.
- Stone fruit, peaches and leaf curl.
- How to prune raspberries.
- Seed germination.
- Moon phase planting.
- Crop rotation.
- Vegetable families.
- Saved seeds – part 2: the practicalities.
- Saved seeds – part 1: the genetics.
- Capsicums, chillies and eggplants.
- Growing veggies in pots.
- Leeks and celery.
- Brassicas and cabbage moth.
- Peas.
- Broad beans.
- Mushrooms.
- Reisetomate tomatoes.
- January resin bee action.
- Why are there no heads on my cauliflowers?
- How to get more broccoli/cauliflower.
- Can worm farm worms survive in the garden?
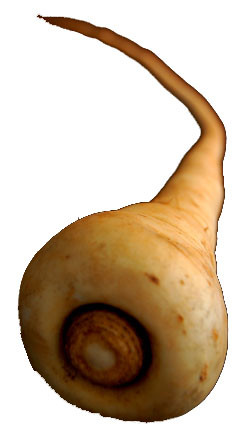
- Growing parsnips.
- How many cauliflowers does one get?
- The results of the great tomato experiment are in!
- Seed saving from unripe tomatoes.
- Native bees and insect hotels.
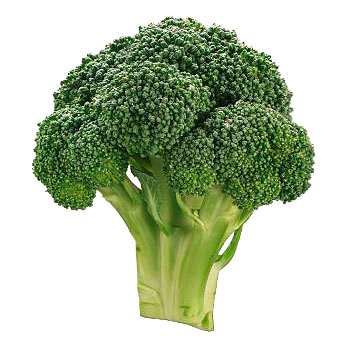
- Harvesting broccoli.
- Is now really the right time to plant garlic?
- Rockmelons: smell their bottoms or watch them change colour?
Cross pollination (May 2023)
Cross pollination is when a flower on one plant is fertilised by pollen from another plant (in contrast to self-pollination, where a flower is fertilised by pollen from the same plant).
Cross pollination relates to the grandparents of the pumpkin rather than to its parents. This is because, when cross pollination occurs, it affects the seeds (which contain DNA from each of the plants) but not the surrounding fruit (which only contains the DNA of the female parent). So, the pumpkin grows normally but any plants subsequently grown from the seeds within it will have uncertain fruit.
Because pumpkin seeds are often the result of cross pollination, they should not be used by home growers to grow new plants. In other words, don’t seed save pumpkin seeds. Ditto cucumbers, gourds, rockmelons, water melons or zucchini.
By contrast, most other vegetables usually self-pollinate so the seeds will be the same variety as their parent plant and they can safely be seed saved.
Note that, in the wild, it is cross pollination which dominates. This is because evolution has led to plants developing barriers to self-pollination as a way of avoiding inbreeding. Self-pollination of vegetables has largely arisen over time through the intervention of humans so that we can grow distinct varieties.
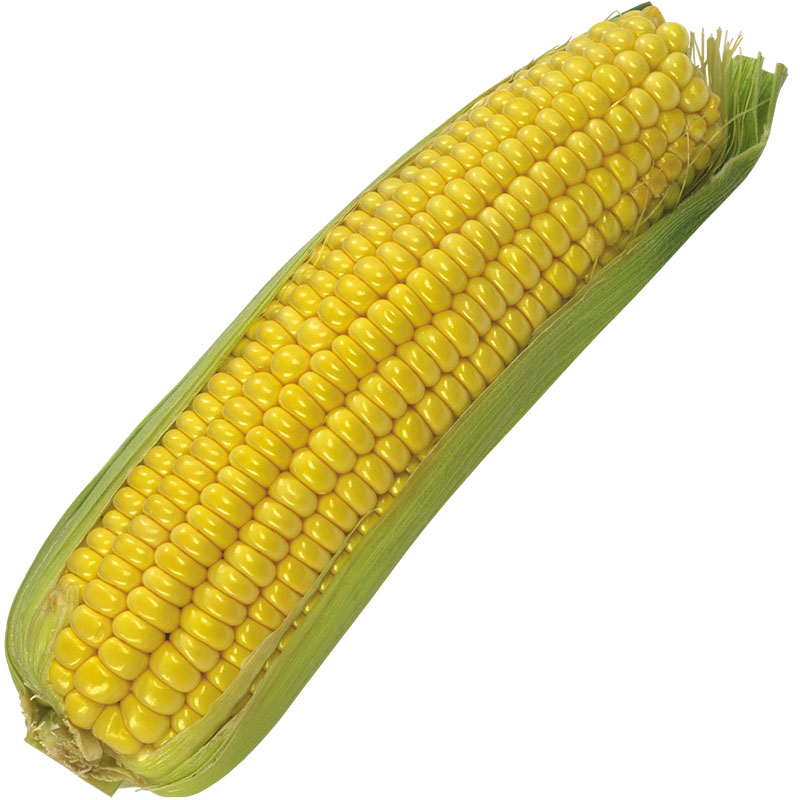
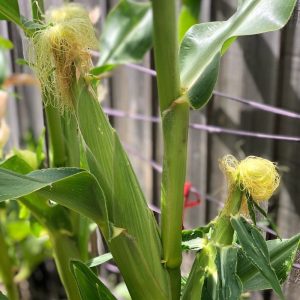 When to harvest sweetcorn (January 2022)

Harvest the ears 20 days after the silk first appears. Or, press a kernel with a fingernail: creamy=ripe; watery=unripe; no liquid=over-ripe.
Note that every kernel on a cob needs to be separately pollinated and, once pollinated, the attached silk usually turns brown and/or falls off. In the photo, there are some brown silks but many yellow silks, so probably many kernels remain to be pollinated.
Hand pollination really helps: each day, pull off a tassel from the top of the plant (the male) and rub it onto the silks (the female).
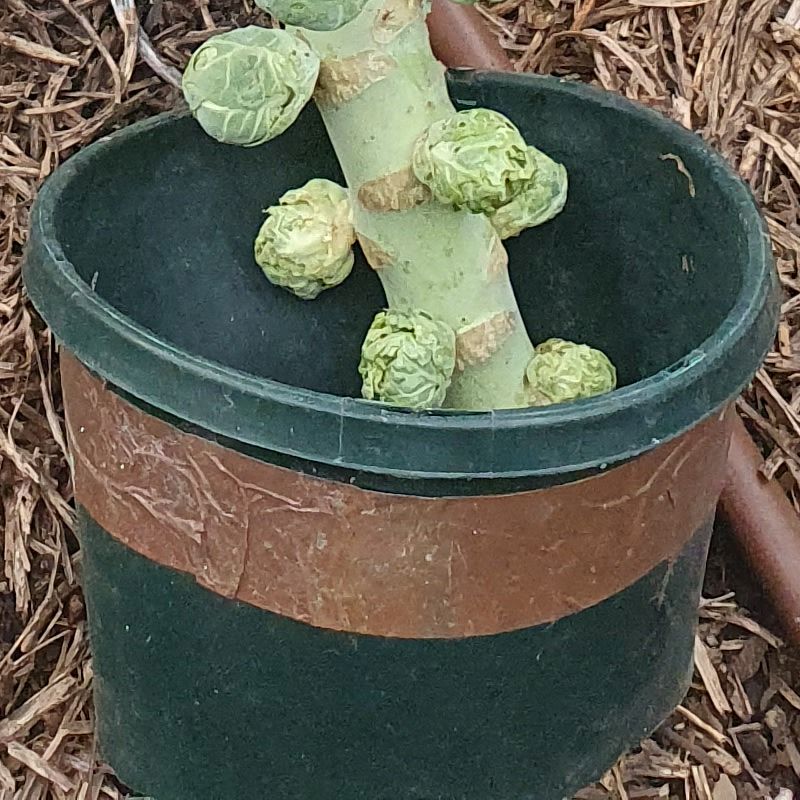
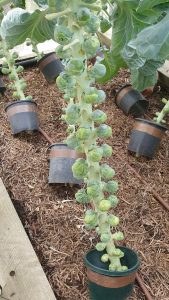 Brussels sprouts as a summer crop (November 2021)
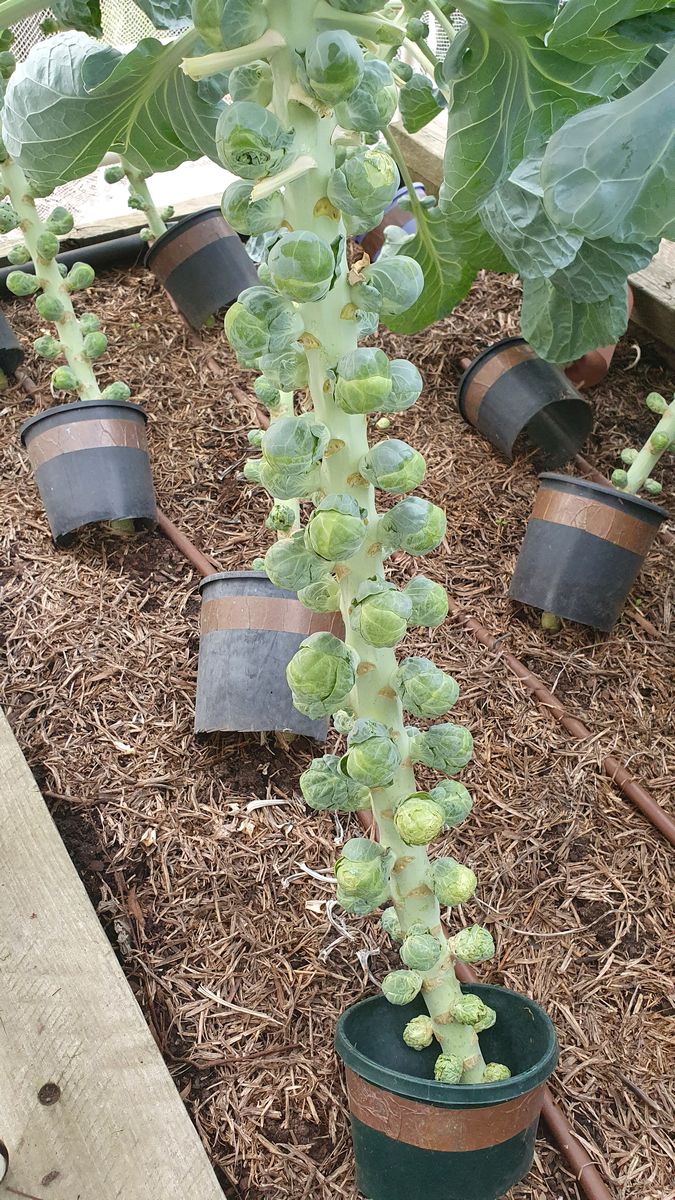
Historically I have never managed to grow Brussels sprouts successfully – the plants grew ok but the sprouts never really formed. So, last year I went to Adams Farms in Coldstream to seek their advice (Adams Farms specialise in growing Brussels sprouts and supply, amongst others, Coles). They told me that they plant their Brussels sprout seedlings in November through to February (rather than in Autumn as I was doing) and they gave me 18 of their seedlings.
The result? I planted the seedlings last November and harvested literally thousands of Brussels sprouts from May onwards: 18 plants with an average of 60 sprouts each equals 1,080 sprouts!
Only grow one variety of sweetcorn at a time (November 2021)
 My granny smith apple tree always produces granny smith apples even though it is sometimes/usually pollinated by some nearby red apple trees. My pumpkins are usually the same as was on the original label even though pumpkins often cross-pollinate (i.e. the male flowers from one plant pollinate the female flowers of another plant) and I grow multiple varieties at the same time. I’ve therefore always assumed that the results of cross-pollination don’t manifest themselves until the next generation. Putting this another way, the fruit is always the variety of the mother plant.
But, as always, there is an exception that proves that rule and, in this case, that exception is sweetcorn. I realised this last year when all of my sweetcorn, both the normal golden bantam and the less common popping corn, produced inedible, somewhat deformed, cobs. From a bit of Internet research, it became clear that the unique aspect of sweetcorn is that what you eat are the seeds (rather than the fruit), that the seeds have a mix of both the mother’s and the father’s genes, and that their physical characteristics can be a mishmash of the two.
Here is a scientific explanation from a New Zealand website: “The proper development of corn kernels requires double fertilisation — that is, two sperm (carried in the pollen) are required to fertilise an ovule. One of the sperm fertilises the egg within the ovule, which becomes the plant embryo. The other sperm fuses with other nuclei in the ovule to become the endosperm of the seed, which will develop into a food source for the developing plant. The endosperm makes up the majority of a corn kernel, which is why the genetics of the pollen source matter so much.” If that has whetted your appetite, the sweetcorn page in Wikipedia also discusses some of the issues.
Jian Liu has written in to say that she has just published a video on how to grow sweetcorn and part of the video discusses the dangers of cross-pollination of sweetcorn!. As well, as my suggestion (only grow one variety at a time), Jian has two other suggestions: separate the varieties by physical barriers, such as a shed or your house (sweetcorn is pollinated by the wind) and/or separate the varieties over time (Jian suggests that plantings should be at least 3 weeks apart). Watch Jian’s video, where the discussion about cross-pollination is from minute 8.45 to minute 12.45.
Consider planting sugar snap peas in the summer (October 2021)
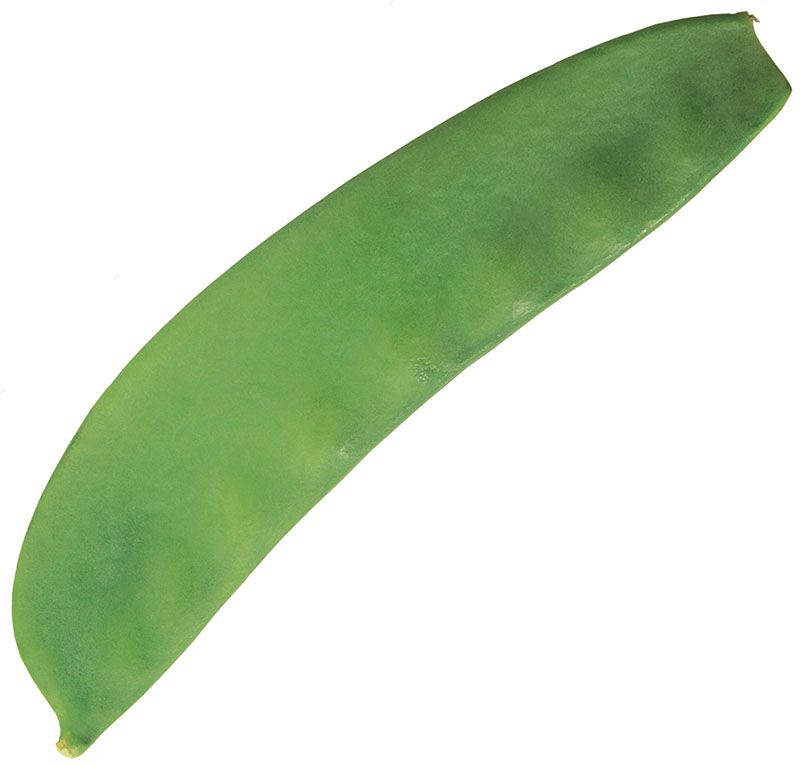 In the UK, where I come from, broad beans and peas are both warm season vegetables which you plant in early Spring and grow over summer. That fitted with my intuition that access to more sun and heat help the juicy beans and peas to develop. But, as standard green beans are also a warm season vegetable, that means that, in the UK, there are too many legumes competing for space in your legume bed over Summer and too few legumes that you can grow in your legume bed over Winter.
When I came to Australia, I found, to my surprise, that broad beans and peas are both cool season vegetables here. At first, I found this a bit disconcerting as it showed (once again) that my intuition can be wrong. But, on further reflection, I became delighted as it means that I can grow broad beans and peas over Winter and then standard green beans over summer. And it also means that I have some spare space in my legume bed over Summer (there are only so many green beans one can eat) to grow a second ‘experimental’ legume, such as peanuts or soybeans. But sometimes being experimental is a bit too much of a fag and one hankers to grow standard vegetables. That is when I discovered that sugar snap peas (but not standard garden peas) can be grown all year round. So, last November, after harvesting the broad beans, we planted some sugar snap pea seedlings and the crop grew beautifully.
So here’s my tip: if you have some spare space in your legume bed after harvesting your broad beans, grow some sugar snap peas.
Grow capsicums and chillies in pots (October 2021)
 There are two big reasons why you should grow your capsicums and chillies in pots rather than in your veggie patch.
The first reason relates to frost tenderness. Capsicums and chillies are both perennial, albeit short-lived (typically living for around three years). But they are also frost tender and are typically killed off by the Melbourne Winter. So, if you want to get full value from your capsicums and chilli, grow them in pots and put those 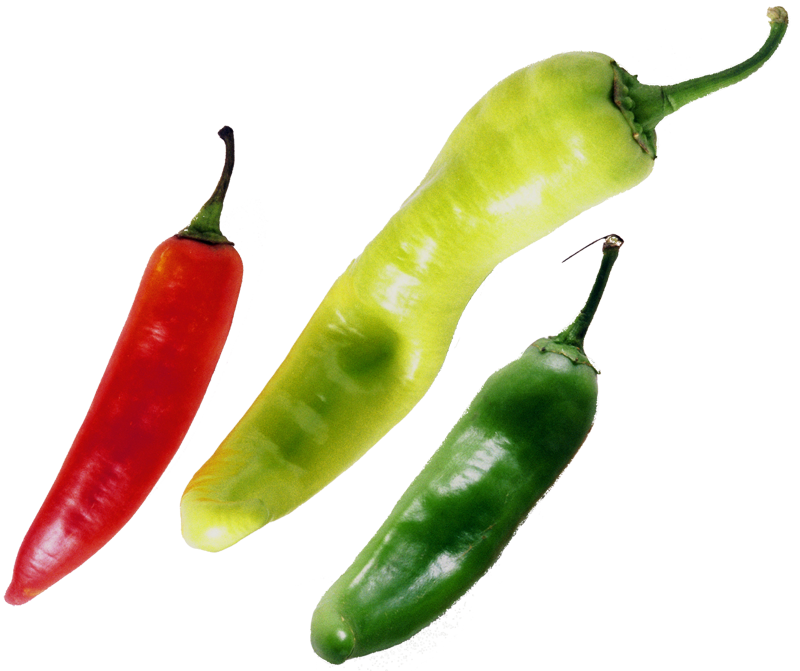 pots in a warm place (e.g. a greenhouse) during Winter before taking them out again in the following Spring.
The second reason relates to crop rotation. One of the annoying points about crop rotation is that you have to allocate equal space in your veggie patch to each of the groups in the rotation. So, for example, you have to have equal space for solanums (capsicums, chillies, eggplant, tomatoes and potatoes) as for legumes (beans and peas).
But most people want to grow lots of tomatoes and don’t want to lose space for these because of space taken up by capsicums and chillies (with all three of these veggies being grown over the same Spring/Summer period). Growing your capsicums and chillies in pots resolves this issue.
A final point: use large pots! Both capsicums and chillies grow much better in large pots than in small pots. I use 330mm (18 litre) pots.
Saving seedlings from snails and slugs (October 2021)
 I use copper tape to deter snails and slugs.
The theory behind using copper tape is that, because snails/slugs are moist and copper is highly conductive, the snail/slug will receive something of an electric shock if the two come into contact and will retreat. No killing is involved.
Just about whenever my wife and I plant a veggie seedling, we cover it with a pot which has its bottom cut out and some copper tape going round it. The copper tape has to form a continual barrier around the whole of the pot as otherwise the snails/slugs will go through the gaps.
We usually remove the pot when the seedling is, say, around 30cms in height. In this way, we have a stack of around 50 pots which are continually being circulated around the veggie patch. Most of the pots are intact apart from having their bottoms cut off but we also have a few with a vertical cut through them as these are easier to remove for ‘wide’ seedlings.
The copper tape is about 2-3cm wide and typically comes in rolls of 4 metres in length. For example, Bunnings call it ‘snail & slug barrier’ and sell a 4 metre roll for $10, which is sufficient for around 15 pots.
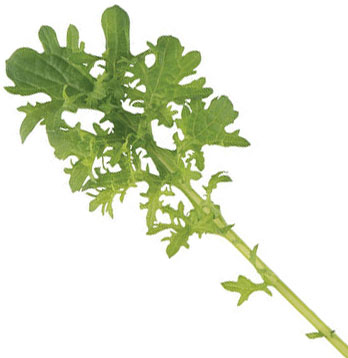
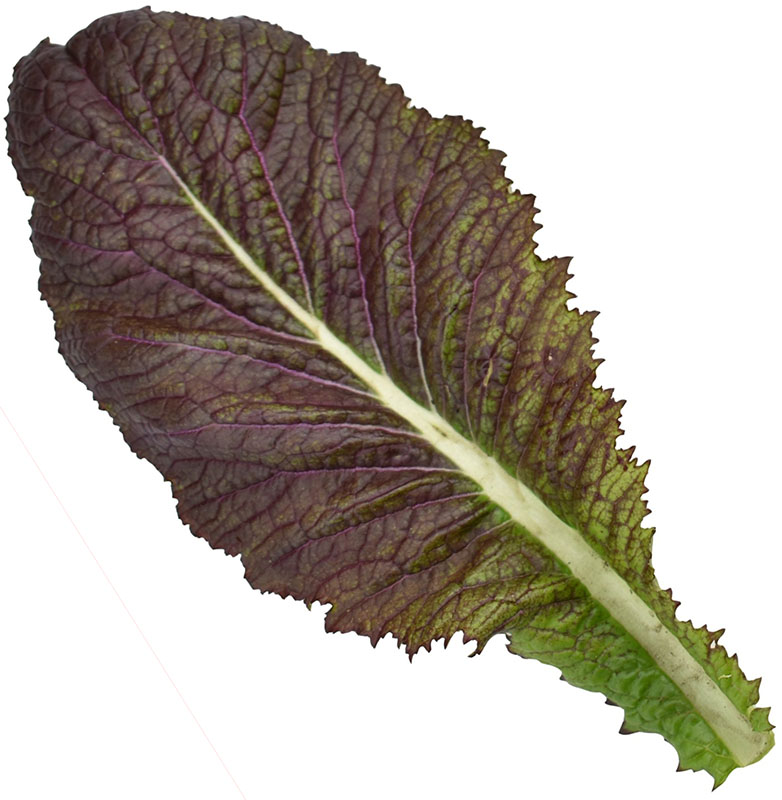
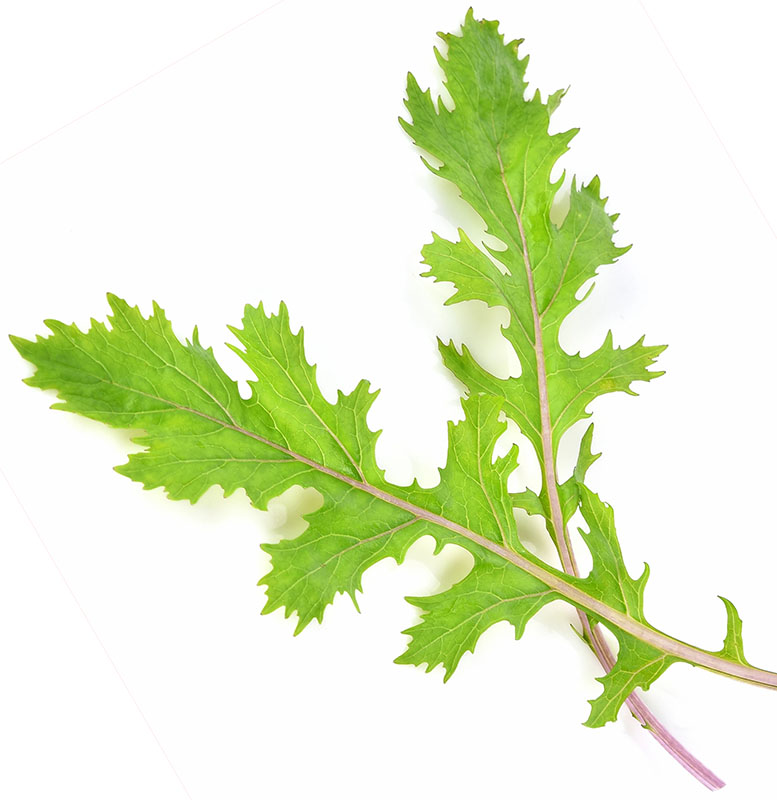
Mizuna and mustard greens (October 2021)
Some people like eating lettuce as their main leafy green. Others like something more peppery, such as rocket (aka arugula). I’d like to suggest that you try either/both mustard greens or mizuna. Both have a pleasant peppery taste which is a bit milder than rocket. Both grow easily and quickly, and you can start harvesting leaves within two months of planting. You can plant them at any time of year. The plants should be spaced around 30cm apart. They also grow well in pots.
Mustard greens comes in two main forms, one with thin frilly leaves and the other with wide flat leaves. I eat both but prefer the former, with ‘golden frills’ being my favourite. Mizuna comes in a single form, with leaves of a similar size to those of rocket. I tend to grow mizuna during the summer because I find that it bolts (i.e. goes to seed) more slowly than mustard greens and I grow mustard greens during the rest of the year because I slightly prefer the taste.
 |
 |
 |
| Mustard greens golden frills | Mustard greens red giant | Mizuna |
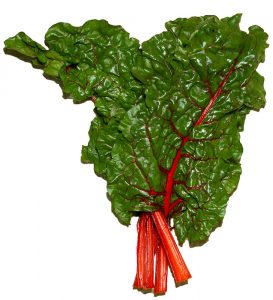 Easy veggies to grow: silverbeet (September 2021)

For beginners, what is a good vegetable to grow? Here is my argument for silverbeet: you can plant it any time of year, it always seems to grow successfully and you can harvest leaves from it at any time. It also looks more interesting than other leafy greens, particularly if you grow a mix of white-stemmed and red-stemmed varieties. And, finally, it is the favourite food of my chickens!
In passing, for beginners, what are difficult vegetables to grow? Here is my list: broccoli, Brussels sprouts, cabbage, cauliflower, okra, peas, rockmelon, sweetcorn, sweet potato and watermelon.
Potato (September 2021)
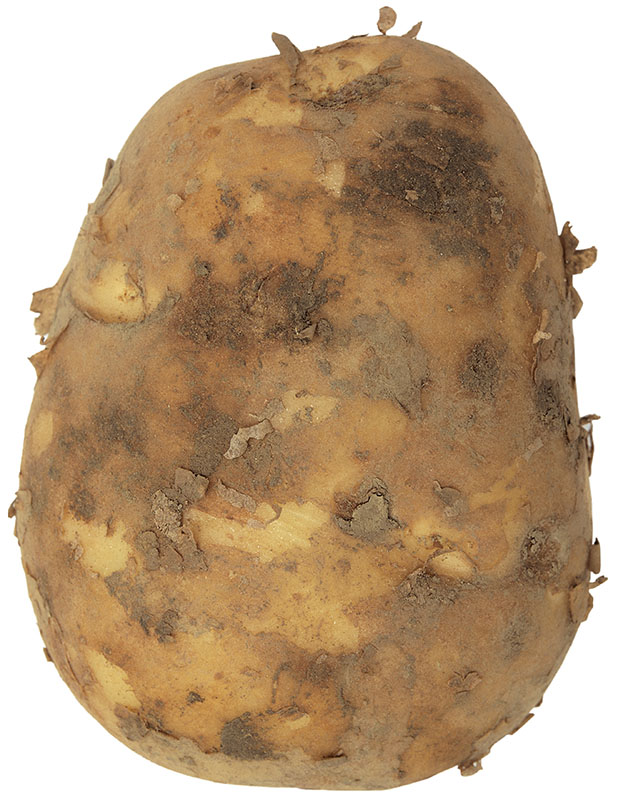 Potatoes are a great veggie to grow: you get lots of potatoes for your potato, you choose your varieties, you can plant them throughout the year, and they don’t suffer from the ‘everything comes at once’ glut. But they have one major problem: once you have grown them in a place, it is very difficult to get rid of them from that place! This is because, although one thinks of them as an annual vegetable, potato plants are actually perennial, with the potato itself simply being a temporary energy storage repository between periods of growth. So if, when harvesting, you miss any of the potatoes, as you invariably will, the plants will simply re-grow and this will screw up any plans or crop rotation systems that you might have.
In this context, my tip is simple: don’t grow potatoes in your main veggie beds. Rather, if you can, grow them in containers (such as bags or sacks) where you can harvest them by emptying out the soil and thus ensure that no potatoes remain.
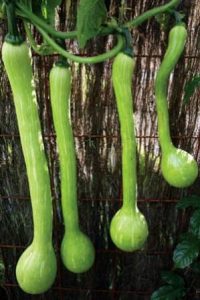 Tromboncino (September 2021)

Consider growing tromboncino this summer. In terms of both texture and taste, it is roughly halfway between a pumpkin and a zucchini. In terms of growth pattern, it is a vine (like standard pumpkins) but can (and should) be grown up vertical structures (unlike standard pumpkins). And its massively long and unusual fruit are both interesting and a talking point.
Tromboncino is sometimes called ‘tromboncino zucchini’, which is a bit odd given that they are different species (tromboncino is Cucurbita moschata whilst zucchini is Cucurbita pepo). I assume that it happens because the Australian language doesn’t have a word or phrase equivalent to the American ‘summer squash’, which are those cucurbits which are harvested when immature and whose most notable examples are tromboncino and zucchini.
Armenian cucumbers (September 2021)
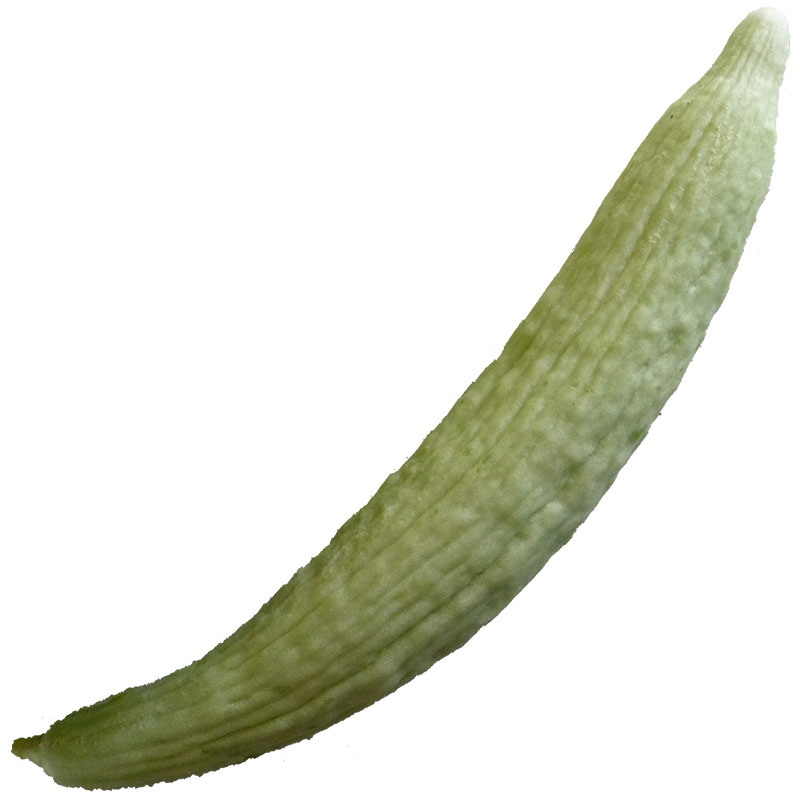 Consider growing armenian cucumbers this summer. Armenian cucumbers (aka snake melons) are a type of rockmelon but they both look and taste like a type of cucumber. If you are bored with growing the same old Lebanese cucumbers each year, try Armenian cucumbers this year: they are extremely prolific and, to my palette, a bit tastier than cucumbers. And you don’t need to peel them.
As someone called Fredric Hasselquist apparently said in the 18th Century, they are “the queen of cucumbers, refreshing, sweet, solid, and wholesome.” Or, as someone called George Post said at the turn of the 19th Century, “it is longer and more slender than the common cucumber, being often more than a foot long, and sometimes less than an inch thick, and pointed at both ends.“
What tomato varieties to grow? (July 2021)
Here are some of the varieties that I planted last year and would be more than happy to plant again: Black Prince (large), Black Russian (large), Jaunne Flamme (standard), Red Fig (small), Rouge de Marmande (large), San Marzano (for saucing), Tigerella (standard) and Tommy Toe (small).
Bananas (January 2021)
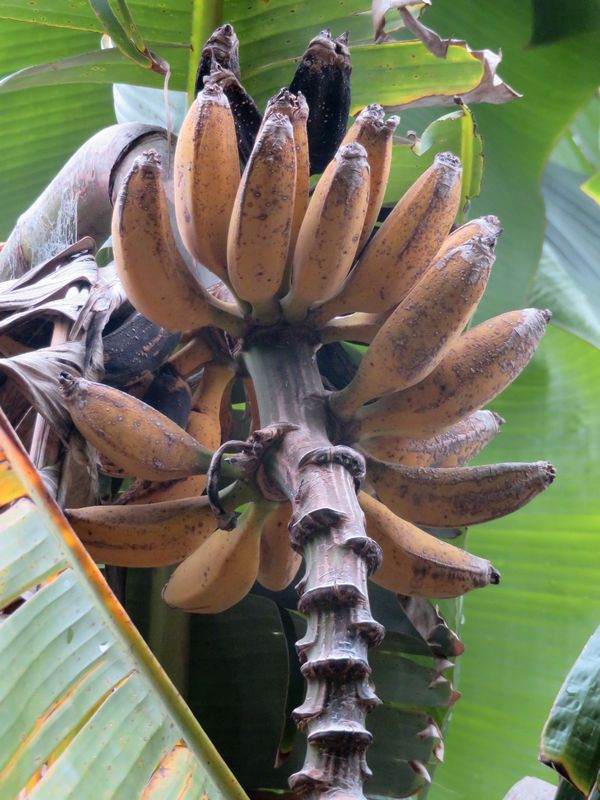 Last week, I harvested my first ever bunch of homegrown ripe bananas! Here is what I have learnt:
- It is possible to grow bananas successfully in Melbourne. Furthermore, they taste yum.
- The plants need protection in both Winter (cf. the frost) and Summer (cf. the intensity of the afternoon sun). I use shade cloth in both cases.
- The plants grow quickly, become enormous (mine are around 5 metres high) and can’t be pruned.
- The trick to getting the bananas to actually ripen is, according to local banana grower Stephen Onians, frequent fertilisation in small amounts.
- A banana plant only ever has one bunch of bananas and then slowly dies (although it produces multiple pups before it dies).
After reading the above, Angelo Eliades wrote in: “Bananas will grow fine in Melbourne, and will ripen if we have a good summer, otherwise they need to be ripened indoors in a paper bag with an apple or two in there. Dwarf varieties only grow to around 1½-2m, taller varieties will grow 2½-4m or more. Bananas are heavy feeders and need to be watered well in hot weather. Treat them like heavy feeder vegies like tomatoes, small feeds of slow-release fertiliser often and consistent water and they will fruit as long as the previous winter isn’t too cold, otherwise they will skip a year and fruit the following year.“
Growing blueberries (July 2020)
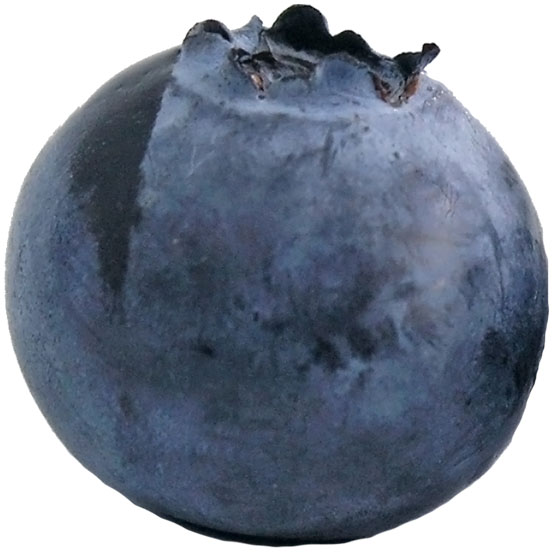 The main species of blueberry is called ‘highbush’, of which there are two types: ‘northern’ (which is deciduous) and ‘southern’ (evergreen). Traditionally, it has been the deciduous northern type that has been planted in Melbourne but Bruce Plain, owner of Bulleen Art & Garden nursery, tells me that, with climate change, the evergreen southern type is becoming increasingly popular. I have roughly equal success (or, more precisely, lack of success!) with both types. If you want to grow the deciduous northern type, now is the time to buy it from your local nursery. If, however, you want to grow the evergreen southern type, wait until Spring. All the varieties seem similar to me in terms of both growing habit and taste.
Blueberries are not grown in normal soil! Rather, they require a pH of 4.5-5.5, which is very acidic. To make the soil this acidic, you can add some granulated sulphur and dig it through the according to the instructions on the packet. To keep the soil acidic, mulch with pine needles. There are a number of pine trees along the Yarra, for example at Lenister Farm – simply take some big bags and scoop the needles off the ground. Keep the mulch away from the stem to prevent collar rot.
Valencia oranges (July 2020)
Winter is the season when many citrus trees bear fruit. But there is one type of citrus which fruits in summer, namely the valencia orange. So, for example, if you have both a navel orange and a valancia orange, then you will have oranges in both winter and summer.
Stone fruit, peaches and leaf curl (July 2020)
Almonds, apricots, cherries, nectarines, peaches and plums are all very closely related (genus Prunus) and are collectively known as stone fruit. They can all be planted now as bare-rooted trees. If you have never grown any stone fruit before, my suggestion is that you start with a plum tree because they have fewer problems than the others: almonds – sometimes doesn’t come out of dormancy; apricots – brown rot and gummosis; cherries – pear and cherry slug; and nectarines and peaches – leaf curl. If you have a nectarine or peach tree (nectarines are just varieties of peach where the skin is smooth), then now is the time to keep your eye on them as you will soon need to spray with a copper fungicide if you want to prevent leaf curl. As Agriculture Victoria says, “Most effective control is achieved by spraying when the buds are swelling but before they have opened.” If you need help identifying bud swelling (as opposed to just buds), have a look at this video from Mt Alexander Fruit Gardens. Here is what Gardening Australia says on the subject.
How to prune raspberries (July 2020)
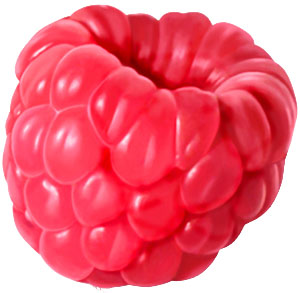 There are two types of raspberry:
- ‘Summer bearing’, which fruit once a year, on 2nd year canes in summer.
- ‘Everbearing’ (aka ‘Autumn bearing’), which fruit twice a year, on 2nd year canes in summer, and on 1st year canes in autumn.
The two types should be pruned differently. If you haven’t yet worked out which type you have, prune them as though they are ‘summer bearers’. Also, prune both blackberries and blackberry/raspberry crosses (loganberries, marionberries, silvanberries, tayberries, etc) in the same way as ‘summer bearers’.
For the ‘summer bearers’: cut all the canes that have fruited down to the ground (because they won’t fruit again). If you don’t know which canes have fruited, they are the longer and thicker ones, and they often have multiple lateral branches. Thin the others to 5-7 per plant, shorten them as desired, and tie the ends to your trellis.
For the ‘everbearers’: you can prune them like the ‘summer bearers’, in which case you will get two crops (in summer and autumn), neither of which will be prolific. Alternatively, you can sacrifice next summer’s crop for a better autumn crop by simply cutting all the canes down to the ground. Clearly, the second approach would not be good if your raspberries are, in fact, ‘summer bearers’ as it will result in no fruit next year! But it is (arguably) the best approach if you want raspberries in the autumn, and it is also the quickest.
I rather like the Wikihow raspberry pruning page.
Seed germination (July 2020)
Here are a few thoughts that you might find helpful. Traditionally, people divide vegetable seeds between those that you should plant directly where they will grow (‘sow direct’) and those which you should initially plant in seed trays, with subsequent transplantation after they become seedlings. Direct sowing is traditionally preferred for both big seeds (e.g. beans, pumpkin), on the positive grounds that they will germinate anyway, and for root crops (e.g. beetroot, carrot), on the negative grounds that they resent transplantation. Our planting guide lists the traditional planting method for each vegetable. My experience, however, is that I get better germination for just about all seeds if I plant them in seed trays in my greenhouse because I can control the environment better.
Some seeds germinate better if they have been pre-soaked overnight beforehand. My list here is beetroot, broad beans, capsicum, celery, chilli, okra, parsley, silverbeet and spinach. I think that it is for different reasons for different seeds and I just follow the rules.
Different seeds can be very different sizes but the same rule of thumb for planting depth applies to them all: 2-3 times the seed diameter.
Seed germination does not require fertiliser or other sources of NPK. Rather, initial germination requires water (to activate the relevant biochemical processes), oxygen (to break down the seed’s food store) and a physically friable medium (to grow through). So, I water my seeds every day (gently) and I plant them in a very light mixture of coir and sieved compost. Once the plant has germinated, its initial, main requirements are light, carbon dioxide and water so that the first (cotyledon) leaves can photosynthesise. In passing, I think that we can sometimes mislead ourselves when we anthropomorphically apply our thinking and terminology to plants. For example, when talking about fertiliser and other sources of NPK, we often use the term ‘food’. But plant ‘food’ is more carbon dioxide and water, with NPK being more like ‘vitamins’.
Moon phase planting (June 2020)
Lots of people (including, by anecdote, many farmers) practice something called moon-phase planting. There are three very different reasons why you might want to consider moon-phase planting, whereby different types of veggie are planted at different times in the moon’s 29½-day lunar cycle. The obvious first possible reason is that you believe in it. The second possible reason is because it helps to impose discipline on your veggie growing activities. The third possible reason is to help give your life cadence.
To believe in it, you have to understand it a bit. The basic idea/assumption/rationale/sophistry is that one wants root crops to grow downwards, and thus when the upward pull of the moon is lessening, and thus when the moon is waning. By contrast, one wants leafy and fruity crops to grow upwards, and thus when the upward pull of the moon is increasing, and thus when the moon is waxing. This gives the following phasing.
- 1st quarter: leafy – plant crops where one eats the leaves/foliage.
- 2nd quarter: fruits – plant crops where one eats the fruit.
- 3rd quarter: roots – plant root crops.
- 4th quarter: have a rest!
To do it for discipline reasons, you have to understand one of its major implications, which is that if you miss the relevant week then you won’t be able to try again for at least a week, and possibly up to a year. Consider capsicum seeds, which are best planted in August or September. There will be usually be precisely one week in August, and another in September, where the moon is in its 2nd quarter. So, you only have two opportunities in the whole year to plant capsicum seeds and if you miss both these opportunities then you won’t have any capsicum plants from seed. So, if you want homegrown capsicums from seed, then you have to be organised and disciplined to get your act together in these two weeks.
Finally, the cadence reason is probably only of potential relevance if you are not in paid work. Those of us who are retired know that days and weeks can flow into each other, with time passing and little rhythm to one’s life. Anything that makes one day different than another, or one week different than another, is welcome.
Crop rotation (June 2020)
If you ever grow veggies, they are likely to include tomatoes and you will probably grow tomatoes every year. But you shouldn’t grow them in the same place every year. Ditto any other vegetable. This is for two main reasons. First, most pests and diseases prefer specific types of plant; if you change the types of plants that you grow in a specific place from year to year then it helps to break the pest or disease’s lifecycle so you will have less pests and fewer diseases. Second, each type of plant places particular demands on the soil in terms of nutrient extraction, etc; if you change the types of plants that you grow in a specific place from year to year then it gives your soil a rest from the particular burdens placed on it. What is true for specific species of vegetable is also true for groups of vegetables. So, for example, tomato, capsicum, chilli, eggplant and potato are all in the same family (solanums), all attract the same pest & diseases, and all place similar demands on the soil.
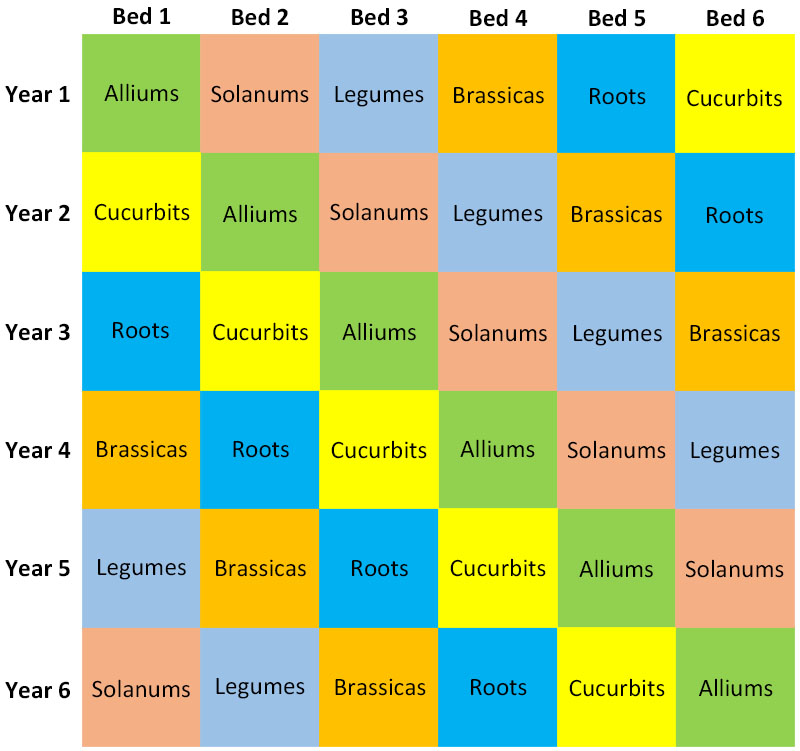 The discussion below talked about 5 groups of closely related vegetables plus a miscellaneous list. Divide the miscellaneous list into ‘roots’ and ‘leafy greens’ and you get 7 groups in total: alliums, legumes, brassicas, cucurbits, roots, solanums and leafy greens. The ‘leafy greens’ group is not relevant to crop rotation – just plant them wherever and whenever you have gaps. So, the ideal is a 6-bed, 6-year rotation for the other 6 groups. If you have fewer than 6 beds, then you can either combine some of the groups (e.g. alliums and roots) or omit some of the groups (e.g. brassicas). You then have to decide the order of how a bed should change over time. A principle here is that heavy feeders should, where possible, alternate with light feeders. So, for example, legumes (light) – brassicas (medium) – alliums (light) – cucurbits (heavy) – roots (light) – solanums (heavy). And, finally, you have to decide when during the year to rotate the crops, with the obvious time being after the summer harvest. See our website for a slightly longer discussion, including which vegetables are in which groups.
Vegetable families (June 2020)
Why is it important to know which vegetables are closely related? First, it helps you work out how to grow them. For example, if you know how to grow pumpkins, and if you know that cucumbers are closely related to pumpkins, then you can guess that cucumbers are prostrate vines, are grown in summer, are heavy feeders and benefit from hand pollination. Of if you know that broccoli is closely related to cabbage, then you can guess that the cabbage moth likes to lay its eggs on broccoli plants and that you need to protect them from this. Second, if you are following some system of crop rotation (and you should!), it helps you decide where to plant them. (Crop rotation will be the subject of next week’s tip.) Many vegetables are in the following 5 groups, where a genus (plural: genera) is a group of very closely related plants and a family is a group of reasonably closely related plants:
- Alliums (a genus): chives, garlic, leek and onion.
- Brassicas (a genus): broccoli, brussels sprout, cabbage, cauliflower, kale, mizuna, mustard greens, pak choy and turnip.
- Cucurbits (a family): cucumber, gourd, pumpkin, rockmelon, watermelon and zucchini.
- Legumes (a family): bean, broad bean, chickpea, peanut and pea.
- Solanums (a family): capsicum. chilli, eggplant, potato and tomato.
The following vegetables are in various other families: basil, beetroot, carrot, celery, coriander, fennel, jerusalem artichoke, lettuce, okra, parsley, parsnip, radish, rocket, silverbeet, spinach, sweet potato and sweetcorn. Here are some characteristics of the 5 groups:
| Group | Growing season | Feeding requirement | What you eat |
| Alliums | varies | light | varies |
| Brassicas | cool season | heavy | varies |
| Cucurbits | warm season | heavy | fruit |
| Legumes | varies | light | fruit |
| Solanums | warm season | heavy | fruit |
Saved seeds – part 2: the practicalities (June 2020)
Although the seeds of a named variety of vegetable will be largely genetically uniform, there will still be minor variations. Choose the best fruit (and thus the best seeds) for your seed saving, rather than eating the best and planting the dross. Incidentally, Richard Dawkins said (in The Ancestor’s Tale) that his father found this one of the hardest lessons to get across to farmers in Africa in the 1940s. Although, as self-pollinators, beans and tomatoes are both good plants for seed saving, they are collected rather differently. Tomato seeds grow in moist flesh and require wet cleaning: pick the fruit when it is just over ripe, scoop the seeds out of the flesh, run water over them to remove any flesh remnants, do something (see next sentence) to remove the gel sac around each seed, and then leave to dry for around 10 days before storing. To remove the gel sacs, which can inhibit germination, either wash and physically rub or leave to ferment in water (or their own juices) for around 4 days (Google for more detail). Bean seeds grow in dry receptacles and require dry cleaning: leave on the plant until they are completely dry and then harvest and store. In both cases, store them in dry and dark conditions. If you want to know more about seed saving, a good book is The Seed Savers’ Handbook. Or, if you want a free booklet: A Guide to Seed Saving, Seed Stewardship & Seed Sovereignty.
Saved seeds – part 1: the genetics (May 2020)
First, some genetics 101. Most living organisms are diploid, which means that they have two copies of most of their genes. These two copies can be the same or different. During sexual reproduction, one of these copies will be chosen at random from each of the mother and the father. The child will therefore inherit half of its genes from each of its mother and its father but which genes it inherits is a random process and will differ from child to child. If you think about it, this means that you will have lots of genes in common with your siblings but you will also have some genes which are different. This is why you bear some resemblance to your siblings but are not identical to them.
Most people who grow from saved seed want their vegetable plants to be the same variety as the mother plant from which they saved the seeds. This is called growing true to type. It is equivalent to wanting the seeds to be genetic clones of the mother plant. But fertile seeds are the product of male pollen fertilising female seeds and, as such, the genes of a fertile seed are a random half from the genes of each of the male and the female.
For this random combination to have the same genetic composition as the mother plant, two things have to be true. First, the male and female parents have to have identical genes (at least for all the genes that make a material difference). Let’s call this condition 1. Second, and perhaps less obviously, for every single gene that matters in both the male parent and the female parent, the two copies have to be identical (this is called homozygosity). Let’s call this condition 2. Named varieties of vegetables are effectively those for which condition 2 is true.
Plants can be either self-pollinators (flowers usually pollinate themselves) or cross-pollinators (one flower has to be pollinated by another flower). For self-pollinators, condition 2 being true implies that condition 1 is also true and thus named varieties will grow true to type and their seeds can be saved. Examples are beans, peas and tomatoes. For cross-pollinators, however, condition 1 will only guaranteed to be true if there is only one variety of the plant being grown in the geographic area. Broad beans, capsicums, chillies, eggplants and pumpkins are all cross-pollinators and thus their seed saving is somewhat problematic. Perhaps most dramatically, cabbage is a cross-pollinator and cauliflower and broccoli are just types of cabbage. So, if you save seeds from your cauliflower, they might well grow into something akin to broccoli (or vice versa). And I know that this can happen because it has happened to me in the past! Heavy stuff! Here’s a web page that covers similar ground using different words.
Robin Gale-Baker has written in: “Thanks for your article about the genetics of named varieties, which I agreed with. I’m always harping on about buying commercial seed for pumpkins, brassicas and other cross-pollinators. My experience is that, whilst lots of tomato varieties usually self-pollinate, the potato leaf varieties, such as Brandywine, often cross-pollinate. The end result is that we are losing some of our varieties at Macleod Organic Community Garden and creating other variations which, whilst interesting, won’t grow true to type. For example, it looks like our Brandywine Pink crossed with our Apollo as the fruit were round like the Apollo but pink like the Brandywine Pink.“
Capsicums, chillies and eggplants (May 2020)
Different veggies have different lifecycles. Many are annuals, which means that their entire lifecycle, from birth to death, takes less than a year. Examples are beans, pumpkins and tomatoes. Others are biennials, which means that their lifecycle, whilst predictable, takes two years. Examples are beetroot, onions and parsley. For some biennials, we effectively grow them as annuals because we eat the things that they produce in the first year (e.g. onions). Yet others are perennials, which means that their lifespan is more than a year but unpredictable. Some perennials typically live for many years (e.g. asparagus and rhubarb), whilst others we effectively grown as annuals (e.g. potatoes).
That brings me, at last, to capsicums, chillies and eggplants. These are perennial but short-lived, typically living for around three years. But, and here’s the main point of this little article, they are frost tender and are typically killed off by the Melbourne Winter. 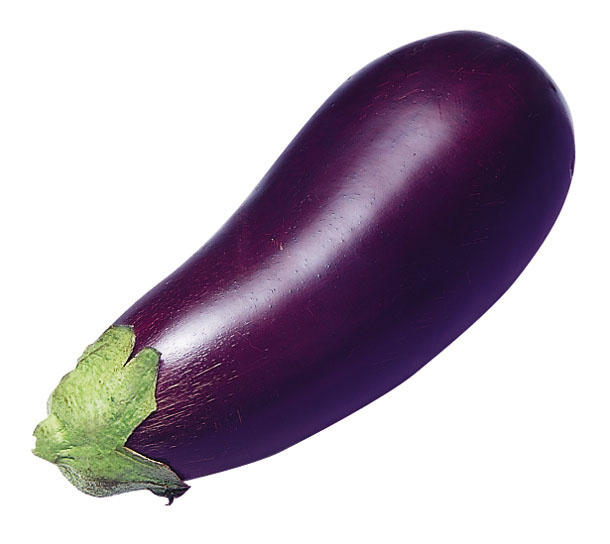 So, if you want to get full value from your capsicum, chilli and eggplant plants, you need to grow them in pots and put those pots in a warm place (e.g. a greenhouse) during Winter. If you have some and they are outside, now is the time to move them to a warmer place (it would have been even better if you had done this before the latest cold spell!).
Growing veggies in pots (May 2020)
Here is a list of veggies that grow well in pots: garlic, leeks, lettuce, pak choy, radish, rocket, silverbeet, spinach and strawberry. To ease your watering tasks, use pots with water wells. Use high quality potting mix but also add some fertiliser (or buy a mix which includes fertiliser) as most veggies are heavy feeders. Then add a liquid fertiliser periodically.
Leeks and celery (May 2020)
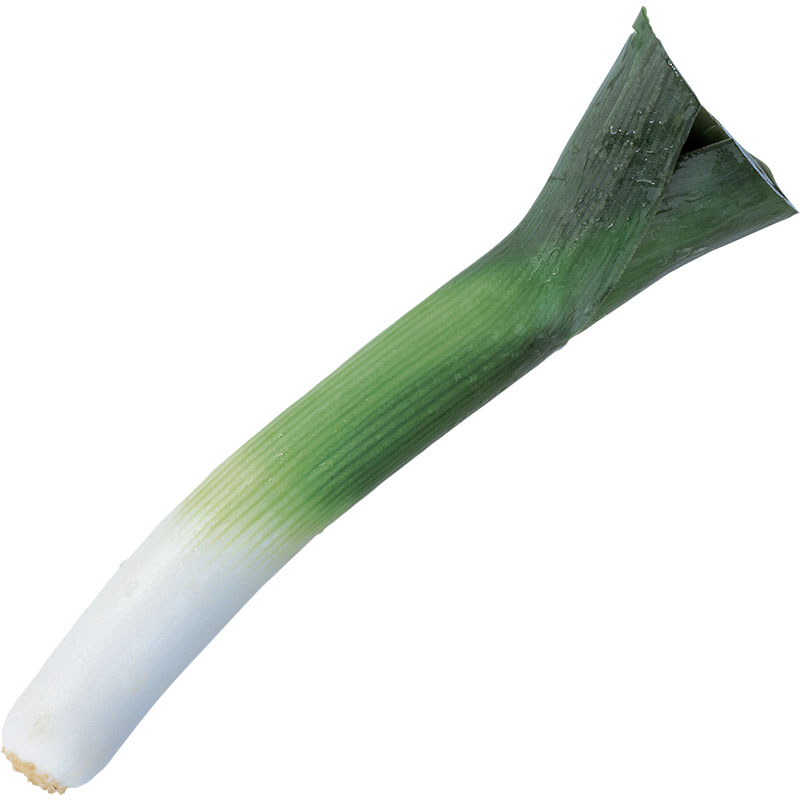 The word ‘blanch’ has two completely different meanings when it comes to food, namely what Wikipedia refers to as blanching (cooking) and blanching (horticulture). In horticulture, blanching is a technique used in vegetable growing whereby light is purposively excluded from part of the plant, usually to make it paler in colour and/or less bitter in flavour. If you look at a mature leek, the bottom bit will be white and the top bit will be green. The white bit is that which was grown underground. If, like me, you prefer white leek to green leek, then you want as much of the leek as possible to have been grown underground. This can be achieved through a combination of two techniques: planting the seedlings deeply (say, up to 5-10cm) and hilling up the soil around the plant as it grows (say, up to another 5-10cm). Watch this video by newsletter reader and leek growing expert Bruno Tigani (Bruno was the person who gave away hundreds of leek seedlings to newsletter readers earlier this year). He plants his leek seedlings in deep holes and then, with rain and wind, the soil collapses in gradually.
Similar opportunities apply to celery where, for example, white, non-bitter celery can be obtained by wrapping the bottom half of the plant in paper.
If you have any doubt about the impact that an absence of light can have on a plant, compare witloof with other forms of chicory.
Brassicas and cabbage moth (Pieris rapae) (April 2020)


Cabbage moths (Pieris rapae) lay their eggs on broccoli, brussels sprouts, cabbage, cauliflower, kale and other brassicas. The caterpillars then eat large volumes of the plant’s leaves. Jodie has written in: “Can you suggest what I can use to repel cabbage moths? They are now everywhere in my garden and holes are appearing on the foliage of my brassicas.“. Kimberley wrote in with a similar question.
Here is my answer. Fine bird netting can stop the moths laying their eggs on your brassicas. You don’t want the netting to rest on the plants, because the moths can then lay their eggs through it, so use some sort of wooden or plastic structure upon which to rest the netting. And make sure that the netting goes all the way down to the ground so that the moths can’t get underneath it.
If, for some reason, you don’t want to use netting, there is another possibility. Cabbage moths are territorial and if they see another cabbage moth in the vicinity, they tend to leave. So, either make, or buy, some decoys – just white butterfly shapes on sticks. Many nurseries sell them.
Growing peas (April 2020)
Peas are one of those veggies which, like sweetcorn, really do taste better when homegrown rather than store-bought. You grow them just like the broad beans discussed last week. The main difference is that most peas are climbing varieties and they need a climbing frame (although you can get bush varieties). The climbing varieties divide into three broad groups: garden/english (your standard pea with non-edible pods); snow (flat, edible pods; used in Chinese cuisine); and snap (pods edible when young). Snap peas are effectively halfway between garden and snow peas and are the ones that I usually grow, eating them like snow peas when young and like garden peas when older.
Growing broad beans (April 2020)
 Before we started growing our own veggies, my wife had never actually tasted broad beans (aka fava beans). They are yum, they are easy to grow and the best time to plant them is now or in May.
Broad beans are a type of legume, like peas, beans, chickpeas, peanuts and soy beans (all of which can be grown Melbourne). Legumes can fix their own nitrogen, so you shouldn’t fertilise the soil. They grow to around 1½ metres tall and, whilst they don’t need staking, it best to avoid them being in a windswept position. My experience is that all the varieties grow similarly and taste the same, so it doesn’t matter what varieties you plant. Germination rates from seeds are usually very good, so if you ever want to try and grow veggies from seed, this is a good one to start with. Pre-soak the seeds overnight before planting and plant them directly into your veggie patch rather than into a seed tray. It will take around 6 months before the beans are ready to harvest. Harvest early rather than late and just harvest what you want for the next meal. In principle, you can freeze your excess beans, particularly if you blanch them first, but in practice, it doesn’t usually work well for me.
Read a more in-depth discussion about growing broad beans.
Grow your own mushrooms (April 2020)
To grow mushrooms, you don’t need any sort of garden because they are grown indoors. Most mushrooms can be grown at home indoors from mushroom kits. This includes lions mane, oyster and shimeji. But perhaps the easiest one to start with is the common edible mushroom, Agaricus bisporus. Local food producer The Mushroom Shed, from Montmorency, sell kits for two varieties of the common edible mushroom, namely swiss brown and white button. The kits are $22.50 each, or $40 for two. They usually sell these kits at Eltham Farmers’ Market and other markets. But they recognise that not everyone can currently go to markets, so they are now offering both a delivery and a postal option. Delivery is available to people in Eltham, Eltham North, Greensborough, Lower Plenty, Montmorency and Research. To arrange, please contact Helen by email (hsimpson1@optusnet.com.au). They can also deliver veggie seedlings, herbs and seeds for orders over $30 – please talk to Helen for a list of available produce. There is no delivery charge. Urban Farming Collective, from Heidelberg Heights, have also started selling swiss brown mushroom kits online. And they are also selling oyster mushroom kits online.
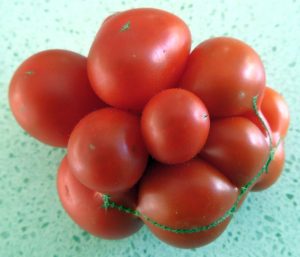 Reisetomate tomatoes (February 2020)
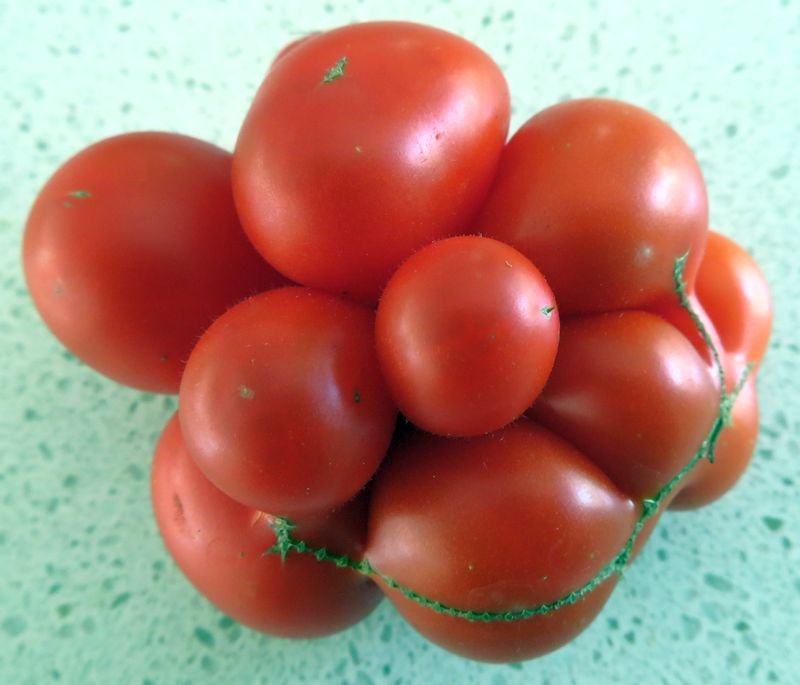
The picture is of a variety of tomato called reisetomate, which I have been growing this year. Each of the bulbous bits is like a whole tomato and you can pluck them off and eat them individually. A bit like taking segments off a mandarin. It’s actually rather tasty.
‘Reisen’ means ‘to travel’ in German. Apparently, the Germans call this tomato ‘the traveller’ because it can be torn apart one piece at a time without a knife while on a journey.
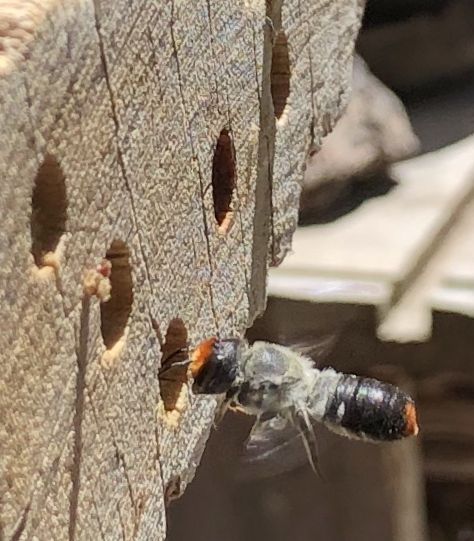
January resin bee action (January 2020)
 Last week saw frenetic action in my insect hotel. All the resin bees from the eggs laid a year ago (i.e. in January 2019) emerged and most of the now empty holes are being filled with new eggs. Look at the picture right, taken last Thursday: of the 6 large holes, resin bees can be seen in 4 of them. But the bee in the bottom middle hole is fundamentally different than the other 3 bees because, whilst the other 3 bees are laying eggs in newly vacated holes, the bee in the bottom middle hole has recently pupated and is just emerging from the hole having eaten its way through the resin cover.
So, here is what I know. First, the resin bee eggs are laid in early January and the bees then spend almost a year inside the hole before eating their way through the resin cover and flying off. Second, within a day or two of the hole being vacated, a resin bee clears the hole out, lays some eggs, and creates a new resin cover.
But here is what I don’t know: are the resin bees laying the eggs the same bees as emerged only a few days’ previously or are they from a different population? Send me an email with your thoughts.
 To which Katrina Forstner responded (January 2020):
When the bees emerge, they are fully mature so potentially it’s the same bee coming back and cleaning out the baby poo and debris from the previous tenants which could include itself and siblings. So they are fully mature, ready to mate and begin nesting when they break the resin seal. You’d have to mark the bee if you’d want to see if it’s the same one returning, but it could also be a native bee from your garden or local area.”
One of the bees an entomologist thinks is visiting my drilled blocks is a brow headed resin bee (Megachile erythropyga). These bees chew up leaves and plug up the ends of the holes.” See picture right.
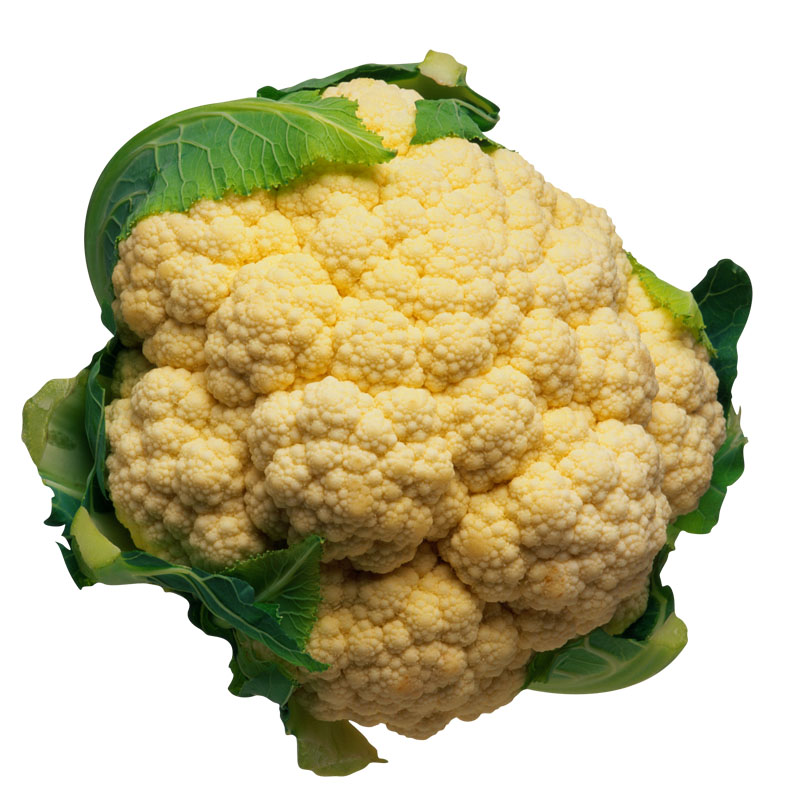
Why are there no heads on my cauliflowers? (September 2019)
 Stephen Brennan has written in: “All of my cauliflowers look like this. Heaps of leaves but no white cauliflower. What is wrong?“
I replied: “Cauliflowers are quite prone to not developing heads. It is usually a sign of stress but that stress can be of different types including: inconsistent moisture; weather that is too warm; or a lack of nutrients. I think you’re now too late to do anything about it this year – try again next year, and make sure you read this article about growing cauliflowers on our website.“
How to get more broccoli/cauliflower (September 2019)
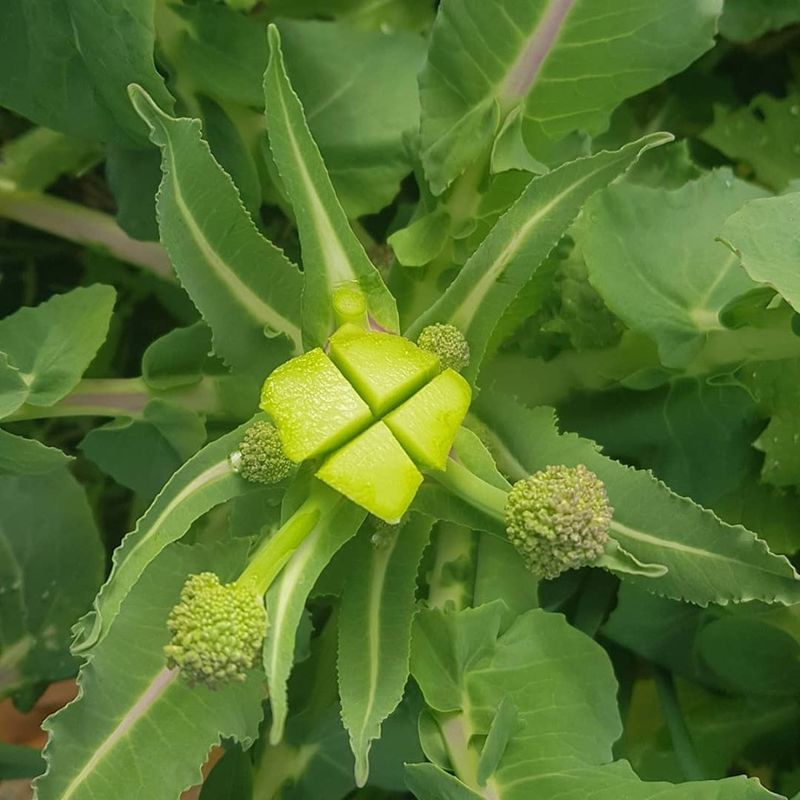 Here is a tip from Good Life Permaculture (also see picture right): when you harvest heads of broccoli or cauliflower, cut the main stem into quarters. This encourages four smaller heads to grow back.
Can worm farm worms survive in the garden? (August 2019)
Brenda has written in to ask if you can transfer worms from worm farm into the garden. Her worm farm is full and she needs to empty it. Will the worms survive?
Here’s my answer: it depends. Compost worms are not the same as garden earthworms and, unlike earthworms, they stay on the surface. So, they can only survive if you have a surface layer of fresh organic material like manures and mulch which both provides them with food and gives them a moist environment.
Growing parsnips (May 2019)
 Stephen Brennan has written in: “Is there any where that I can buy parsnip seedlings at the moment? I have tried planting seeds with limited success.“
I replied: “No, I don’t know anywhere that is selling parsnip seedlings currently. I checked with some of my local nurseries and they said that they don’t currently have any and are not planning to get any in the near future. There appear to be two reasons for this. First, most people plant parsnips in late Winter or early Spring (i.e. Aug-Oct) rather than in Autumn. Second, parsnip seedlings are very fragile and thus, at least anecdotally, susceptible to transplantation shock and so it is generally recommended that they are grown from directly sown seed (rather than either seedlings or seed trays).
“I agree that germination rates for parsnip seeds are not great. In reaction, I use fresh seed only and plant very closely (e.g. a centimetre apart), thinning them out later if needed.”
How many cauliflowers does one get? (April 2019)
Stephen Brennan has written in: “With my broccoli and cauliflower, do I only get the one floret on each plant?“
I replied: “re cauliflower, yes, you only get one cauliflower per plant. Re broccoli, there are different types of broccoli. With standard broccoli, you get one main head and then, later, maybe a few more, smaller side heads. With sprouting broccoli, you get multiple, small florets. With romanesco broccoli, you only get one head per plant.“
The results of the great tomato experiment are in! (April 2019)
 At the start of this warm season, my wife and I set up two identical raised beds for growing tomatoes. Let’s call them ‘neglect’ and ‘nurture’. Each bed had 8 tomato frame cages, with each bed growing the same 8 varieties of tomato. In the ‘neglect’ bed, there were 2 tomato plants per cage, no removal of side shoots, and no bird netting. In the ‘nurture’ bed, there was 1 plant per cage, regular maintenance, bird netting and the quiet singing of sweet lullabies. The question being investigated was the extent to which, in terms of tomato yield, the nurturing would offset the halving of the number of plants.
The results were rather different for the different types of tomato. For the large, beefsteak tomatoes, the ‘nurture’ bed yielded more tomatoes, even with half the number of plants, and they were better quality and larger – a major win for the ‘nurture’ bed. For the small tomatoes (say tigerella and below), neglect had less of an effect and the ‘neglect’ bed yielded more (although not twice as many) fruit and of similar quality – a win for ‘neglect’. Finally, for the sauce tomatoes (San Marzano and Roma), many in the ‘neglect’ bed, but none in the ‘nurture’ bed, suffered from blossom end rot – a win for ‘nurture’.
So, in conclusion, large beefsteak and sauce tomatoes should both be grown in ‘nurtured’ beds where the plants are widely spaced (i.e. 1 plant per cage). Small tomatoes are more tolerant of ‘neglect’ and close spacing (e.g. 2 plants per cage).
To which Karen Sutherland responded (April 2019):
Interesting experiment, and these sorts of topics are covered in (my) growing section of the Tomato book. Smaller fruited growing plants are (generally) more resistant to disease and therefore more able to be grown in less than ideal conditions, including some shade. They are therefore more suitable for growing in ‘neglect’ gardens. Larger fruited tomatoes are generally more fussy, and are best grown in ideal conditions such as your ‘nurture’ bed. Good to have these types of examples such as yours to get people thinking more.
Seed saving from unripe tomatoes (March 2019)
I was asked whether the seeds from an unripen tomato will still produce a plant. My answer is that tomatoes continue to ripen after being picked so, if there is even the slightest blush on the tomatoes, pick them and hopefully they will ripen, with the seeds also maturing. If they don’t ripen, there is still a chance that some of the seeds are viable, but only if a gel has developed around them. In addition to visual inspection, you can test for gel by trying to cut the seed with a sharp knife – if it is easily cut then there is no gel, but if the knife tends to slip off the seed then there is gel.
Native bees and insect hotels (January 2019)
 It appears that native bees can take as long as a year to emerge. In January 2018, native bees visited my insect hotel and filled 8 of the holes (at a rate of roughly 1 hole per day for 8 days) – see top picture right. Over the coming months, nothing further happened (well, actually lots happened involving crickets, spiders, flies and ants, but that’s another story). In November, I happened to meet Katrina Forstner from Buzz and Dig and asked her why nothing had ever hatched. She advised me to wait until the summer. Sure enough, last week (and again at a rate of roughly 1 hole per day), all of the holes became unplugged and (presumably/hopefully) young native bees have emerged – see middle picture right.
Stop press! Yesterday, 3 or 4 days after the last hole was unplugged, I saw multiple native bees visiting the unplugged holes, going in both forwards and backwards repeatedly, and scrabbling around whilst in there. Presumably/hopefully laying eggs. See bottom picture right, which is a closeup of one of the holes. I sent this photo to Museums Victoria for identification and within the hour(!) they replied to say that it is a resin bee, genus Megachile. Or, as my wife said, what a cutie!
Harvesting broccoli (October 2018)
Stephen Brennan has written in: “I seem to have a problem with some of my broccoli. Plenty of leaves but not much in the way of florets. Some gave yellow flowers – have they gone to seed?“
I replied: “I sympathise as I also sometimes have problems growing broccoli (ditto cauliflower). The broccoli we eat is the unopened flowers of the plant so if you had flowers then you must previously have had broccoli. Perhaps you were growing sprouting broccoli, where the incipient flowers (aka florets) are much more loosely grouped into heads than is the case with standard/Calabrese broccoli and therefore are more easily missed. If so, the good news is that sprouting broccoli produces new florets over time, so leave the plants in the ground and watch closely!“
Stephen also asked: “How do I know when my broccoli is ready to harvest?“
To which Guy replied: “It can be harvested any time from when the head appears to just before some flower petals start to appear or the head starts becoming looser in structure. Picking early is safer but your crop will be less. If you see even a hint of yellow, pick immediately.
Is now really the right time to plant garlic? (April 2017)
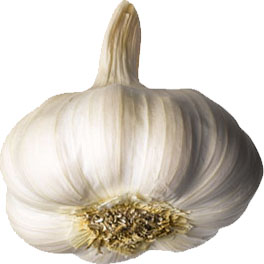 In this month’s excellent Sustainable Macleod’s newsletter (click here to read the newsletter or click here to sign up for future newsletters), Robin Gale-Baker ruminated about whether the recent warm weather means that we should be deferring our garlic planting. She and I have subsequently debated the subject in more detail. It is a tricky issue, with no clear answer. The salient facts are:
- In Melbourne, garlic is usually planted in April.
- Robin thinks that the soil is currently too warm for garlic planting.
- According to Gardenate, it is ok to leave the planting until May (or even June).
- Like onions, garlic plants are sensitive to the length of the day, with the start of bulb formation (and the end of leaf growth) being triggered by a day length exceeding X hours. (This website says that X=13 and this website says that this will happen on 13th October.)
If you plant too early (i.e. when it is too warm), a risk is apparently that the resulting bulbs don’t divide into separate cloves. If you plant too late, a risk is apparently smaller bulbs (because, per day length, the garlic starts trying to form bulbs when it is too young). One potential way around this dilemma is to keep the garlic in the fridge for 30-40 days before planting. I am going to try all the possible options and will report back in due course.
Guy Palmer later added to the debate (in November 2017):
We decided to run a controlled experiment, the first results for which are now available. The first results relate to Monaro Purple hardnecks. Rows of garlic were planted two weeks apart over an 8-week period from mid April to mid June. In addition, some garlic was kept in the fridge for 40 days from mid April and then planted. All the plants died back at the same time (second half of November) and were harvested on 24th November. The key results were:
- The April plantings produced a normal number of normal-sized garlics with normal cloves.
- The May plantings produced the same results as the April plantings but in a bit less time.
- The non-refrigerated June plantings produced much smaller bulbs, half of which were not divided into cloves.
- The refrigerated June plantings (perhaps surprisingly) produced the same results as the April and May plantings.
I asked farmers Warren McKimmie, from Strathewen-based Sugarloaf Produce, and Mark Sherwin, from Montmorency-based The Mushroom Shed, what they thought of the results. Neither was surprised.
The conclusion: continue to plant your garlic in April or May even if the weather is warm. If you forget, try putting your garlic into the fridge for a bit before planting.
Chris Newman later added to the debate (December 2017):
Chris Newman has written in to say that he is concerned that my wording might be taken to mean that people should have harvested all their garlic by now. Rather, as Chris says, one should wait until the green tops have died back and the timing of this might vary by variety, when they were planted, their watering regime, etc. Chris’s garlic has not yet reached this stage.
Chris also pointed out the aphorism: ‘plant your garlic cloves on the winter solstice (the shortest day of the year) and then harvest them on the summer solstice (the longest day of the year)’. For me, this aphorism is in the same category as ‘plant your tomatoes on Cup day’ – both timings are a month or so too late.
Finally, Chris is also growing elephant garlic, an alternative to garlic which is technically a leek (Allium ampeloprasum) rather than a garlic (Allium sativum). According to Wikipedia, elephant garlic, unlike standard garlic, does not have to be harvested each year but can be ignored and left in the ground without much risk of rotting. Chris says that the the Macleod Organic Community Garden elephant garlic has had some little babies on the side, so he will be leaving some in the ground at home to see what happens. Elephant garlic has a mild, sweet flavour that is somewhere between garlic and onion.
Guy Palmer later added to the debate (December 2017):
My Australian White hardnecks have now died back and I have therefore harvested them. Here are the results:
- Normal-sized garlics: the April plantings, the early May plantings, and the refrigerated June plantings.
- Small garlics: the late May plantings and the unrefrigerated June plantings.
So, based on my experiments, the conclusion remains: continue to plant your garlic in late April or early May even if the weather is warm. If you forget, try putting your garlic into the fridge for a bit before planting.
Rockmelons: smell their bottoms or watch them change colour? (February 2016)
 Sometimes growing vegetables seems easy. Last year, we grew cucumbers. We got millions of them (well, say 50). And they grew quickly, each fruit only taking around a week to go from first appearance to full size and ready for harvesting. And (importantly), my wife had a recipe for pickling them, with results that we both thought were yummy.
Sometimes, however, things seem more difficult (and, therefore, actually more interesting!). This year, our chosen cucurbit was rockmelons. Initial developments were promising: we successfully pre-germinated the seeds, then put them into seed trays, then transplanted them to the veggie patch. But the day after transplanting them, we woke to find that all bar one had been eaten by snails. How to protect the last one? Our solution (thanks, Google) was to put copper tape (thanks, Bulleen Art & Garden) around the remaining seedling. Apparently, snails get a slight electric shock if they touch copper, so they won’t cross it.
After a few weeks of prolific growth, the flowers started appearing and we began our daily task of hand-pollination (cucurbits have separate male and female flowers). Around 10 melons appeared within the next few weeks and grew to a reasonable (i.e. eatable) size. But they didn’t look ripe and, indeed, they didn’t pass my wife’s daily smell test (smell them at the stem end to see if they have developed a sweet aroma – she calls it “smelling their bottoms”). A fortnight later, my impatience got the better of me and I picked one but it was completely unripe. Perhaps our variety never becomes sweet, I thought. Just wait some more, said my wife.
So, we waited and waited, with ritualised smelling of bottoms each day. Then suddenly (i.e. overnight) one of them completely changed colour, from green to yellow (see picture), with a noticeably sweet aroma. We picked it and, sure enough, it was as juicy and sweet as we could possibly have hoped for.
The moral is the obvious one: patience is a virtue (or, maybe, the wife is always right!).